#professional headshots at home#ai headshot source photos#take headshot at home#headshot lighting#source photo tips
Professional Headshots at Home: How to Get Source Photos Right
·8 min read
Introduction
You can take professional headshots at home and still get a polished, credible result, as long as your source photos are clean, well-lit, and consistent. If you're preparing uploads for an AI headshot tool, the photos you capture today decide how natural and professional your final images look. Better input means better output.
This guide walks you through exactly how to take a headshot at home for AI generation: the lighting, the angles, the facial variety, and the background choices that produce high-quality ai headshot source photos. You'll also learn what to avoid, because a few common mistakes can quietly ruin an otherwise good set. By the end, you'll know how to prepare a small batch of photos that gives any AI model the best possible material to work with.
What You'll Need
You don't need studio gear. A modern smartphone camera is enough for strong ai headshot source photos. Before you start, gather a few basics:
A recent smartphone with a clean lens. Wipe it first.
A bright window or any large, soft light source.
A plain wall or simple background in a neutral tone.
10-20 minutes to capture variety without rushing.
Two or three outfits that match where the headshot will appear, such as LinkedIn, a resume, or a company page.
Most AI tools work best with roughly 8-20 photos, so plan to capture more than you think you need. Extra frames give you room to drop the weak ones later and still keep a strong, consistent set.
Step-by-Step Guide
Follow these steps in order. Each one affects how realistic and professional your final AI headshots turn out, so it's worth doing them properly the first time.
Step 1: Set up soft, even lighting
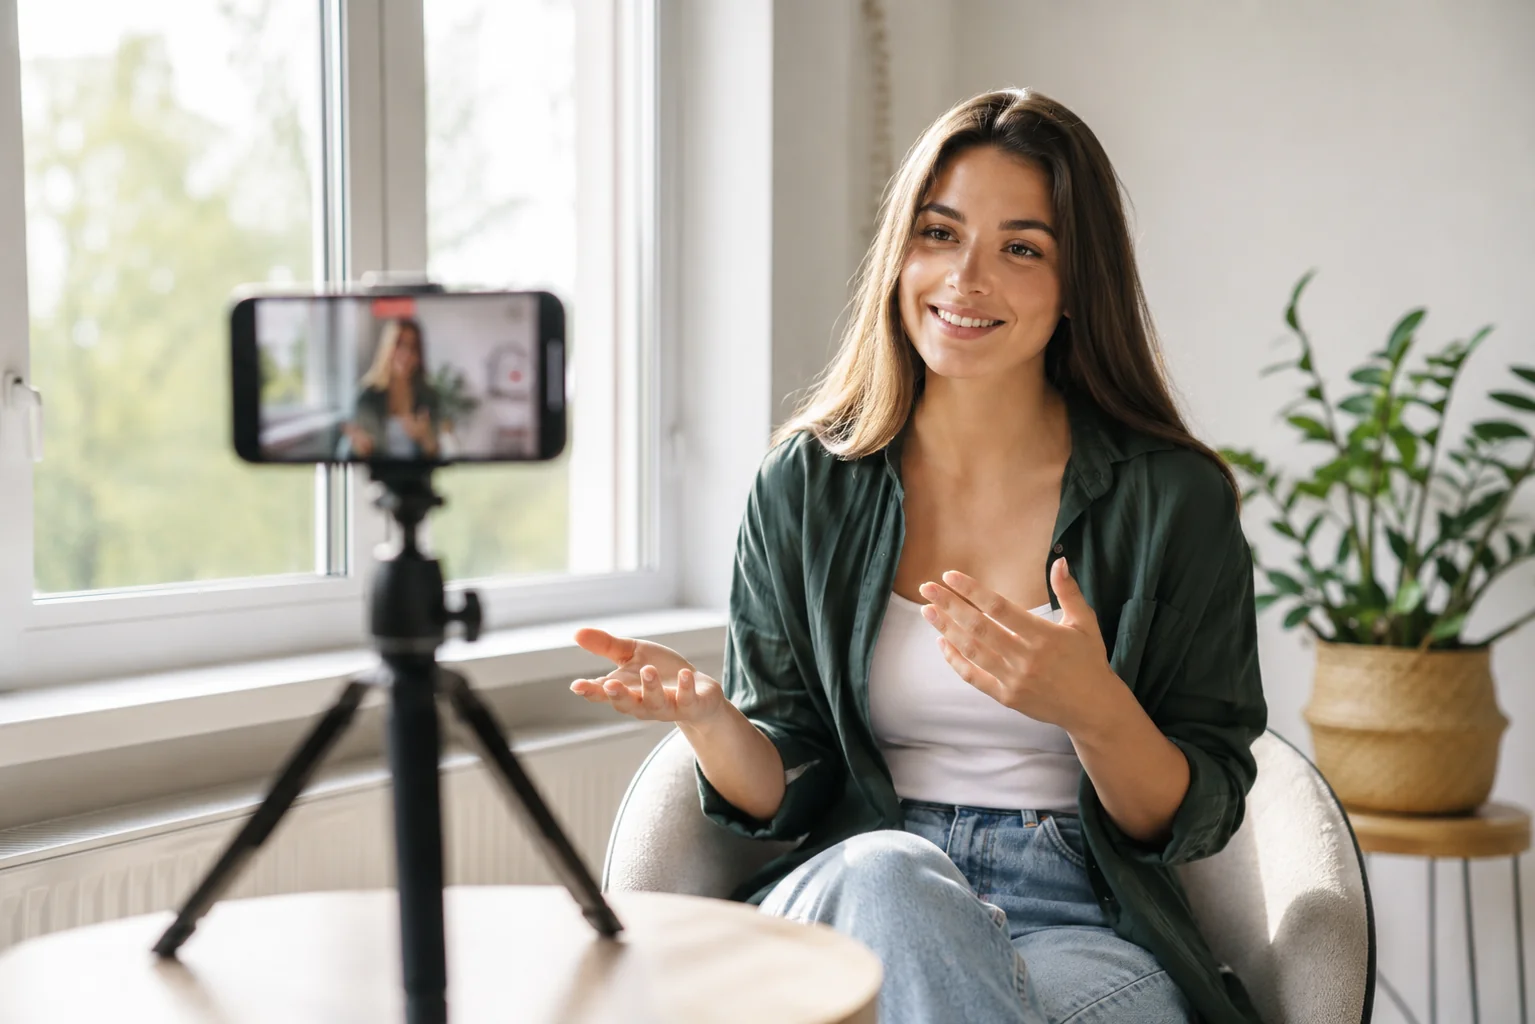
Lighting is the single biggest factor in photo quality. Stand facing a large window during daylight so the light hits your face evenly. Soft, diffused light reduces harsh shadows and unflattering contrast, which is why portrait photographers favor north-facing windows or overcast days. Avoid direct overhead light or a bright window behind you. Backlighting throws your face into shadow and confuses the model about your real features.
Why it matters: even lighting gives the model accurate detail about your skin, eyes, and bone structure, so the output looks like you rather than a smoothed-over stranger.
Step 2: Fix your camera angle and distance
Hold the camera at eye level or very slightly above. Shooting from below adds an unflattering angle and distorts proportions; shooting from too far loses facial detail. Keep the camera roughly arm's length from your face and frame from mid-chest up. A consistent, natural angle helps the AI learn your true face shape, while mixed extreme angles produce inconsistent or warped results.
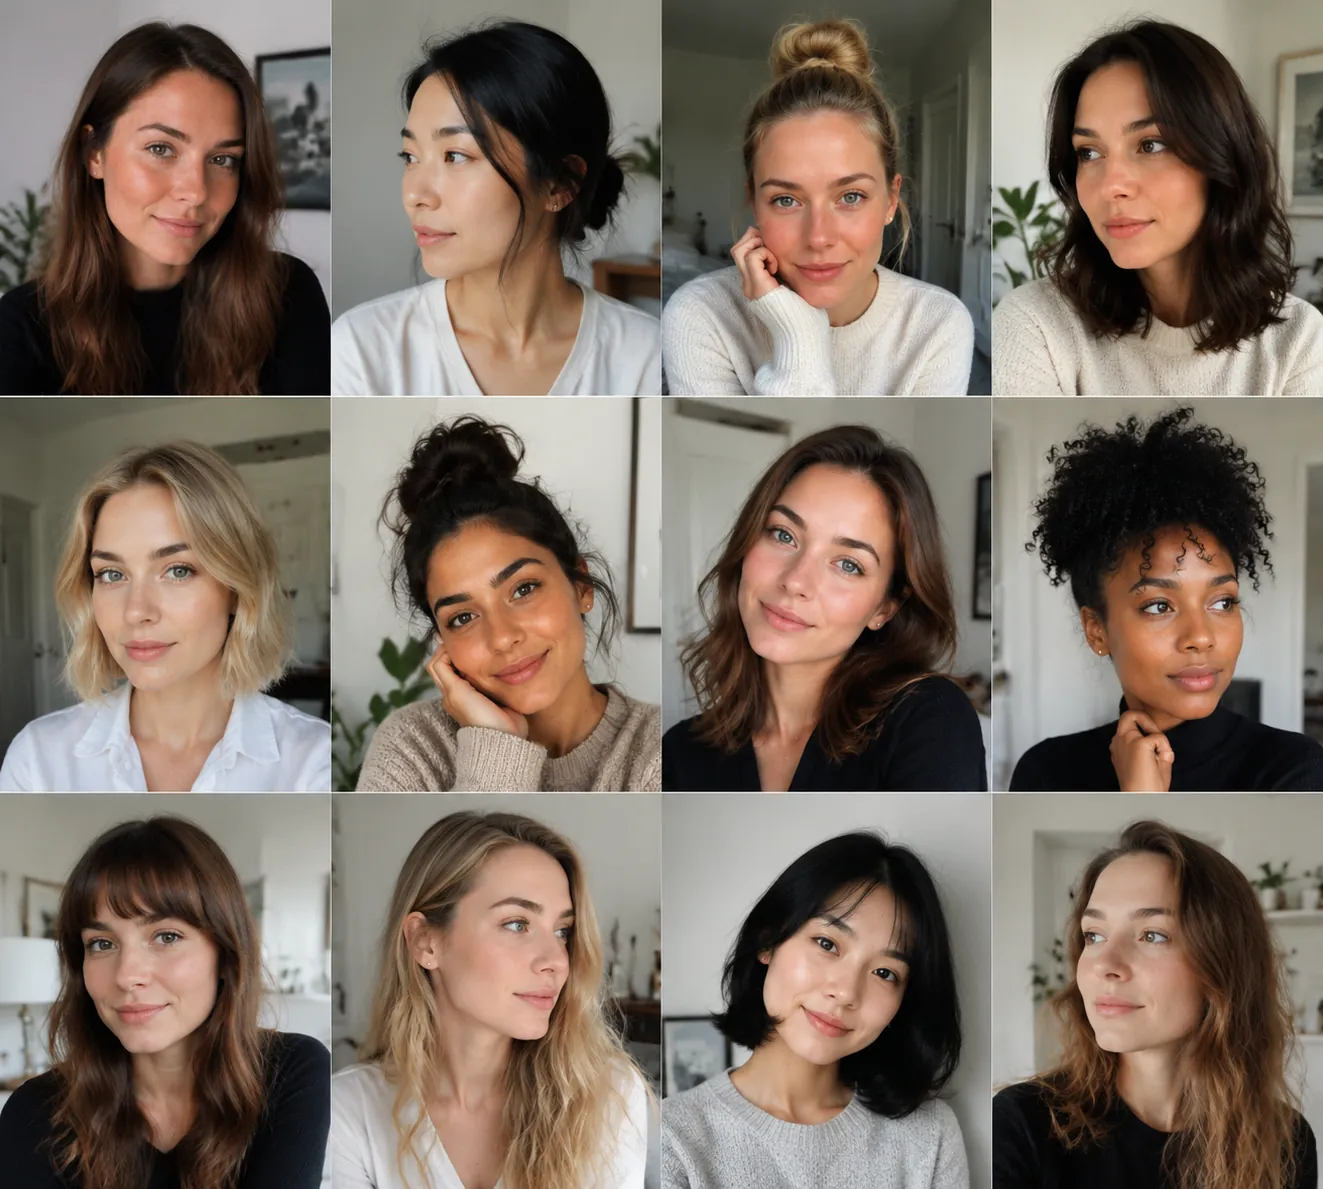
Step 3: Capture facial variety
Take photos with a few different expressions and small head turns: straight on, a slight turn left, a slight turn right, a soft smile, and a neutral confident look. Keep your eyes open and looking toward the lens. Variety teaches the model your face from multiple angles, which improves likeness across the final set. You can also compare professional headshot styles across roles and industries to decide which expression suits your channel before you generate.
Step 4: Handle glasses and hair deliberately
If you wear glasses every day, include several photos with them on, but watch for glare on the lenses. Tilt your head slightly until reflections disappear. If glare is unavoidable, capture a few frames without glasses too. For hair, style it the way you normally present at work and keep it off your face. AI models reproduce what they see. Lens glare can blur your eyes in the output, and an unusual hairstyle in your source set may carry into every result.
Step 5: Keep the background simple
Stand a foot or two away from a plain, neutral wall in white, gray, or a soft muted color. A clean background helps the AI separate you from your surroundings and keeps the focus on your face. Busy or cluttered backgrounds introduce noise the model has to work around, which can lower the quality and consistency of your final professional headshots at home.
Create Professional Headshots in Minutes
Upload 5-20 everyday photos and get 40-100 polished AI headshots for LinkedIn, resumes, company pages, and executive bios.
15-30 minute delivery • Full commercial rights • One-time payment
Get My Headshots →A phone, a window, and a plain wall are enough for clean source photos.
Pro Tips for Best Results
Once your setup works, a few refinements separate good source photos from great ones.
Shoot in short batches. Capture 8-12 frames, review them, then adjust. It's easier to fix lighting after a quick check than to discover problems in 50 unusable photos.
Stay consistent within a session. Keep the same lighting and distance so the model gets a coherent picture of your face. Save variety for outfit and expression, not the technical settings.
Skip beauty filters and heavy editing. Smoothing and reshaping change your real features, so the AI learns the edited version instead of you.
Match the channel. If these photos lead to a profile picture, dress the way that audience expects. For framing and styling specific to that platform, see our LinkedIn headshots guide.
For platform-specific framing and recency, LinkedIn's own profile photo recommendations are a useful reference before you choose which generated images to use.
Common Mistakes to Avoid
Most weak AI headshots trace back to a small number of avoidable input errors. Scan this table before you upload.
Mistake
Why it hurts AI results
Fix
Backlighting from a window
Face falls into shadow; features unclear
Face the light source instead
Only one or two photos
Too little data for a consistent likeness
Capture 8-20 varied frames
Heavy filters or beauty mode
Model learns an edited, unnatural face
Use the unedited camera
Busy background
Adds noise and lowers consistency
Use a plain neutral wall
Glasses glare
Blurs the eyes in the output
Tilt your head or add no-glasses frames
Many university career centers publish similar guidance on professional presentation, and the same fundamentals of a clear face, neutral background, and recent photo apply whether you photograph yourself or generate the final image.
Final Thoughts
Professional headshots at home come down to controlling a few fundamentals: soft even lighting, an eye-level angle, genuine facial variety, deliberate handling of glasses and hair, and a clean background. Get those right and your ai headshot source photos give any model the detail it needs to produce natural, credible results that look like you on your best day.
Start with a small set of clear, well-lit frames, choose a style that fits where the headshot will appear, and drop anything blurry or inconsistent before you upload. The better your input, the less you'll need to redo later. When you're ready to turn those photos into polished, professional images, use the CTA below to begin.
Create Professional Headshots in Minutes
Upload 5-20 everyday photos and get 40-100 polished AI headshots for LinkedIn, resumes, company pages, and executive bios.
15-30 minute delivery • Full commercial rights • One-time payment
How many photos do I need to take headshots at home for AI?
Most AI headshot tools recommend roughly 8-20 source photos. Capture a few extra so you can drop any that are blurry, poorly lit, or inconsistent and still upload a strong, varied set.
What lighting is best for professional headshots at home?
Soft, even daylight from a large window facing you works best. It minimizes harsh shadows and gives the model accurate facial detail. Avoid backlighting and direct overhead light, which obscure your features.
Should I include glasses in my ai headshot source photos?
If you wear glasses daily, include several clear frames with them on, but watch for lens glare. Tilt your head until reflections disappear, and add a few photos without glasses as a backup.
What background should I use for home headshots?
A plain, neutral wall in white, gray, or a soft muted color is ideal. Stand a foot or two away from it so the AI can cleanly separate you from the background and keep focus on your face.
Can phone photos really produce professional AI headshots?
Yes. A recent smartphone with a clean lens, good lighting, and varied angles provides enough quality for strong results. The biggest factor is your source-photo discipline, not expensive equipment.